
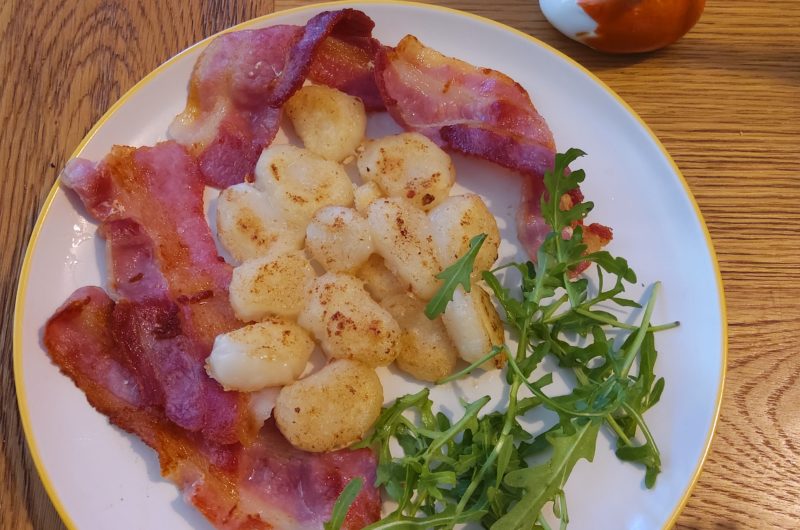
I first discovered these in a recipe book from the excellent Korean cook Maangchi, and these are an absolute staple in our household now. I love an adaptable, earns-it’s-own-keep recipe and this one really is a jack of all trades; Koreans love them rolled into finger length and width sticks and covered in spicy sauce as a snack, but you can also drizzle them with honey and sprinkle with sesame seeds for desert, add them to soups as dumplings for some substance, spear them on barbecue skewers with veg, prawns, halloumi or meat for a barbecue, throw them in a stir fry or our favourite… fry them crispy with egg, bacon or prawns! Non-meat alternatives would work just as well here of course. Thin sliced tofu with soy sauce and sesame oil would go great instead!
The other beautiful thing about these is as well as being versatile and easy to make, you can freeze them and just break a few off and thaw them in a cup of boiling water before cooking them.
Important note:
Traditional Korean Rice Cakes are pounded hard after the cooking part is done and before rolling and slicing, as doing so makes them more elastic. However, the more elastic they are the harder they are to chew, and there can be a choking risk for the very old and young. Asian countries see a death rise from choking during holidays when these cakes are often eaten. As a result I tend to make mine small like this, and I don’t pound them! Frying or boiling them afterwards also cuts down on the risk as it gives them a less sticky outside and less elastic inside.
Photos:
Korean Rice Cakes
Course: Uncategorized5
servings20
minutes4
minutes?
kcalIngredients
2 cups Mochi flour (see ‘Mochi Flour – What Is It?’)
1 cup freshly boiled water
Sesame oil
1/2 tsp fine salt
Directions
- In a large bowl, put the mochi flour and salt together and combine. Boil the water and as soon as it has boiled, pour it into the mix.
- Stir the hot water into the mix until it becomes a slightly wet, crumb-ey dough mixture as shown in photo two
- Cover the bowl with cellophane, leaving a small hole at the side for steam to escape as shown in photo three, and microwave for two minutes
- Remove from microwave. At this point the mixture will start to be elastic and dough-like. Stir so that any loose or dry outer parts are mixed in, but be aware the dough will resist you stirring it as it will be very thick so don’t fret if you don’t do a perfect job.
- Spread the dough out a little so the next cooking can permeate well, cover with the cellophane wrap (leaving a small hole) again and microwave for a further two minutes.
- Using oven gloves or a teatowel, remove the bowl from the microwave. Careful, it will be very hot! The mixture will now be very elastic and much smoother
- Put 1tsp of sesame oil on your work surface, and take the hot dough out of the bowl and put it on the oil. I often roll the dough around on the oil a little at this point, to loosen it up.
- Taking your rice paddle, chop the dough into six roughly equal pieces. Put five of them back in the bowl and cover the bowl with a damp tea towel to stop them drying out
- Shape your dough piece into a rough cylinder by rolling it between your hands. If you find it keeps springing back into its old shape and doesn’t want to roll, try pulling it length-ways a little.
- Use the rice paddlers edge to chop your cylinder into 1/2 inch slices, like you were slicing a cucumber. Be aware that not only are the dumplings ready to eat at this point, but snacking on the odd misshapen one is definitely recommended. You know, strictly for perfectionist reasons…
- Repeat 9 and 10 for the remaining five dough pieces, adding more sesame oil as needed to stop sticking and add flavour
- When you’ve finished all of them, drizzle a little more oil over them lightly to prevent them sticking together too much and put any you won’t be using immediately into a zip lock bag to freeze for later
- To thaw, put as many as needed in a cup or bowl and pour boiling water over them. Leave to stand for 10-15 mins, then use as wanted.
Notes
- Traditional Korean Rice Cakes are pounded hard after the cooking part is done and before rolling and slicing, as doing so makes them more elastic. However, the more elastic they are the harder they are to chew, and there can be a choking risk for the very old and young. Asian countries see a death rise from choking during holidays when these cakes are often eaten. As a result I tend to make mine small like this, and I don’t pound them!


Recent Comments